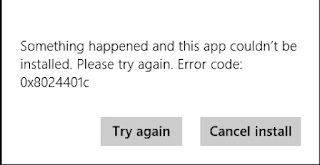
Windows UPDATE ERROR 0X8024401C Fixed
The Error 0x8024401c is common one of the adored and largest failure Error of the Windows OS. Normally these types of error appear in the Windows Operating System(OS). If the system is unable to download and install Windows Updates.
WHY YOU GET UPDATE ERROR 0X8024401C
If you are facing an error "0x8024401c" this means your system is damaged. This means error usually occurs some following causes:
Wrong registry entries.
The file is Corrupted or system file is broken.
Wrong installation.
Incomplete un-installation of software.
Unsuitable deletion of applications.
Replacement of hardware without proper procedure.
The updated error "0x8024401c" damage your windows operating system. Normally, the removed files in your operating system can result in causing such an error.
Some Viruses can generate to the same problem. sometimes when your computer directly shutdown then also some files can get damaged and as a result, you will see this error on your screen.
Windows and system 32 files when are damaged, generally you will show this error. Otherwise, new driver and software installations can generate error and hardware will be affected.
Fix Windows Update Error 0x8024401c?
This types of error generate multiple reasons
This types of error occur due to multiple reasons
there are several reasons for fixing the error. follow this given instruction to fix the error.
Firstly Verify the network setting.
Update the Drivers Versions.
Finish SFC Scan
Go for a clean boot.
If you have any query or doubt related to these error resolution steps contact with Microsoft customer care support.
Step 1. Installation of Adequate Drivers
If you identify the error occurs due to this reason you can try uninstall of the generic drivers and reinstall again accorded by the manufactures of the driver. Follow this given instruction
Use the Windows + X key together
Then click on Device manager
Choose the driver not functioning/working
Click on the right and open properties
Also, Open the Details tab
Search Driver IDs that appears in the list on clicking over it.
Open the Driver tab and then uninstall the driver.
Select the first line and go to a web browser and paste and you see the original manufacturer.
Download the drivers and install successfully.
Reboot your computer system.
Step 2. Automatic Update of Drivers is Recommended
In, this process the Driver updater tool is automatically Update all driver differentiate every individual device of the computer automatically.
Step 3. Go for an SFC Scan Process:
Use Windows + X key mutually to open Command Prompt
Enter sfc/scannow going to the command section.
SFC scan begins and it will scan the files open and replace the corrupt or wrong files automatically.
Once you are sure that are identified you can attempt updating.
Step 4. Verify the Network Settings:
Use Windows + X key together and open the Network connections.
Click on the right on the link for eg.either LAN or Wi-Fi that you are using then select Properties.
Next to uncheck the iPv6 box and confirm the selection.
WHY YOU GET UPDATE ERROR 0X8024401C
If you are facing an error "0x8024401c" this means your system is damaged. This means error usually occurs some following causes:
Wrong registry entries.
The file is Corrupted or system file is broken.
Wrong installation.
Incomplete un-installation of software.
Unsuitable deletion of applications.
Replacement of hardware without proper procedure.

The updated error "0x8024401c" damage your windows operating system. Normally, the removed files in your operating system can result in causing such an error.
Some Viruses can generate to the same problem. sometimes when your computer directly shutdown then also some files can get damaged and as a result, you will see this error on your screen.
Windows and system 32 files when are damaged, generally you will show this error. Otherwise, new driver and software installations can generate error and hardware will be affected.
Fix Windows Update Error 0x8024401c?
This types of error generate multiple reasons
This types of error occur due to multiple reasons
there are several reasons for fixing the error. follow this given instruction to fix the error.
Firstly Verify the network setting.
Update the Drivers Versions.
Finish SFC Scan
Go for a clean boot.
If you have any query or doubt related to these error resolution steps contact with Microsoft customer care support.
Step 1. Installation of Adequate Drivers
If you identify the error occurs due to this reason you can try uninstall of the generic drivers and reinstall again accorded by the manufactures of the driver. Follow this given instruction
Use the Windows + X key together
Then click on Device manager
Choose the driver not functioning/working
Click on the right and open properties
Also, Open the Details tab
Search Driver IDs that appears in the list on clicking over it.
Open the Driver tab and then uninstall the driver.
Select the first line and go to a web browser and paste and you see the original manufacturer.
Download the drivers and install successfully.
Reboot your computer system.
Step 2. Automatic Update of Drivers is Recommended
In, this process the Driver updater tool is automatically Update all driver differentiate every individual device of the computer automatically.
Step 3. Go for an SFC Scan Process:
Use Windows + X key mutually to open Command Prompt
Enter sfc/scannow going to the command section.
SFC scan begins and it will scan the files open and replace the corrupt or wrong files automatically.
Once you are sure that are identified you can attempt updating.
Step 4. Verify the Network Settings:
Use Windows + X key together and open the Network connections.
Click on the right on the link for eg.either LAN or Wi-Fi that you are using then select Properties.
Next to uncheck the iPv6 box and confirm the selection.


Comments
Post a Comment